Microscopy event

5 Steps in Creating a Virtual Classroom for Life Sciences

Five steps to consider when setting up an effective virtual classroom.
Universities around the world are slowly moving towards web-based learning, especially due to the recent outbreak of COVID-19, which single-handedly changed how universities were able to continue teaching. The traditional way of teaching life science students shifted from textbooks, lectures, and laboratory sessions to a completely web-based learning system. An effective virtual classroom will enhance student learning and create a safe and secure learning environment for teachers and students alike. But not everyone has enough resources to make this digital transformation.

Why is Creating a Virtual Classroom Important?

A virtual classroom or web-based learning is an innovative way to engage students during the COVID-19 pandemic. Like many universities around the world, they could not stop teaching for long periods of time. They had to create a new way to engage and educate their students effectively. If they could not accomplish this task, then everyone suffers. Students are not able to continue their education, and in many cases, especially in the United States, their money is at risk with no assurance of a refund. The average annual cost of room and board at public colleges is $11,500 and nearly $13,000 at private schools [1]. Educators and students needed to continue and the only way to do that was to find an alternate solution, a collaborative solution because team-based learning methods contribute to a deeper understanding and long-term retention. The underlying need is that the virtual classroom needs to be effective for the students and teachers alike. There are 5 general steps that one must take into consideration to create a virtual classroom for students to collaboratively learn effectively.

Stay Ahead with Insights from Precipoint!

Welcome to our newsletter! Be the first to know about our latest products, services, webinars, and happenings in PreciPoint. Don't miss out on this opportunity to stay informed. Subscribe to our newsletter today!

By clicking “Subscribe”, you agree to our privacy policy.

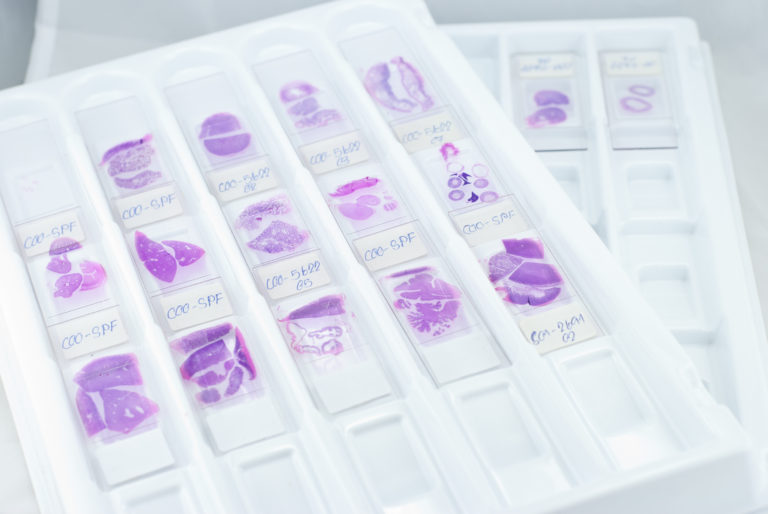
Step 1: Glass Slides

Text: Glass slides are essentially where this process starts. Without glass slides, there would be no material for students to analyze. Teachers should have a collection of glass slides that are waiting to be digitalized. It is important when selecting the samples. The quality of samples can play a big part when starting to digitalize them. If the samples are old and the staining is faded, then it is much harder to produce a high-quality digital scan. Another option is to get already digitized sample collections from other universities or archives that share them.
Glass slides histology

Step 2: Digital Microscope/ Slide Scanner

Now comes the digitization! There are several digital scanners on the market today. Picking the correct one for the job is crucial. You must first look at your needs. Some questions might be:
  • Do I have to continuously scan new slides or is a one-time scanning of a sample-set sufficient?
  • How many slides do I need to be scanned per day?
  • What type of specimen is being scanned, and what type of objective do I need?
  • Do I need pre-scanned slides to distribute and share?
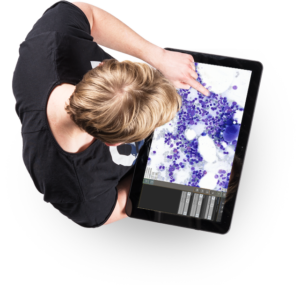
  • Or can I present the slides live with real-time scanning via screen sharing?

To digitize your samples, you can choose between various systems:

1. Microscopes with cameras attached to the top

They only allow for a live presentation of the shown region of interest and are limited in their field of view. You can then share the image from the camera via screen sharing. They are usually more affordable, but also limited.

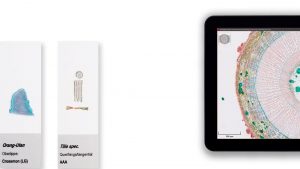
2. Microscope and scanner hybrids

They do both whole slide scanning and live viewing of the samples. Live viewing means, you can instantly navigate through the whole inserted slide and look at every detail, without having to wait. This enables you to instantly present slides directly on the microscope to the audience. But it will not create a file. Whole slide scanning is used to create a virtual microscopy file of the slide. In that way, you can independently work online on complete virtual slides and share them. These hybrid systems offer the greatest flexibility.

3. Dedicated scanners

 They have the capacity to scan the whole slides for later viewing. They lack the option to directly look at the slides or present certain slides to the audience without first scanning them. Some of these devices can store many slides at once and automatically scan them. This is advantageous if you continuously need to scan large amounts of slides.

Types of Digital Microscopes and Scanners

Scanning Capabilities

Many qualifications depend on the department or application that is being addressed. There are scanners out in the market that can scan at 100x oil immersion which might be better for educating students who are looking at blood cell morphology and then there are some that are limited on their scanning capabilities. But once a scanner or digital microscope/hybrid has been selected then the process of digitizing the glass slides can commence.

Available Technologies

Conventional manual digital microscopes (microscopes with cameras attached to the top), hybrid systems, and slide scanners are currently offered by several companies globally. The prices can vary from a few thousand to anywhere upwards of several hundred thousand euros, for example, Motic, Hamamatsu, Zeiss, 3DHistech, Leica, Aperio, Philips, and PreciPoint all offer scanners and/or digital microscopes with different capabilities.

Throughput Options

There are differences depending on the throughput demand. Some come with a slide loader, which makes it possible to load several slides into a cassette. In the next step, the slide scanner can process them one after another. However, digital microscopes or hybrid systems that must be manually fed slides are much more affordable and usually work well for education purposes.

Step 3: Image Storage (Slide Scanners)

How much space is needed for virtual slides?

Once the glass slide has gone through the scanning process, a place to store the digital file must be implemented. For a whole slide image (WSI), the file size can range on average from several MB up to 70GB, and this depends on the magnification, the physical size of the sample, and most important the file format at which the slide is scanned [2]. Some file formats are relatively small due to effective compression. Another factor is the size of the ROI (region of interest) that is scanned.

For example, if a professor is teaching a class about hematology and scanned the slides at 100x oil immersion, then those scans are going to yield a large amount of data. If you compare that to someone who is teaching a class about pathology and they are only using a 20x objective to scan, the pathology slides would be much smaller in size. So, it is crucial to look at the capacity needed for storage.

Where can the virtual slides be stored?

When it comes to storing images on a database there are only two ways. You can have the database be located on-premises (locally) or in the cloud (web-based). Most hospitals and universities require the database to be on-premises, this is due to privacy data security, and because existing laboratory information systems may require a locally running server. There are benefits for both on-premises and cloud-based storage, but as stated above, on-premises has the highest demand. Contrary to a popular belief a database that is cloud-based usually has better scalability and data security. For students, it is much easier to access a cloud-based storage server because they do not have to connect to a VPN to access the data that is stored locally.

Microscopy course software infrastructure

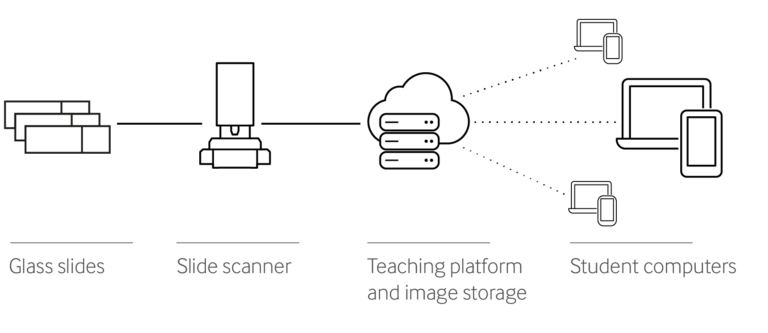
Step 4: Video Conferencing Software and Teaching Platform

Now that you have some digital specimens to show, it is time to present them and the related subject matter to your students. The minimum you need for this is an online conferencing tool. The conferencing can be a simple online meeting where you share your screen with the audience to show them your presentation or digital slides directly from your computer. It can also be more elaborate if needed, which we will talk about in the Teaching Platform section. It may seem obvious, but it is important to make sure you have a quiet place and if you turn your camera on, a clean background and enough light. For a more natural presentation, your camera should be placed on the eye-level or slightly below. And finally, before you start your class, always test your tech first.

The basic equipment you will need consists of:

1. Video conferencing software

2. Webcam (integrated into your notebook or detachable)

3. Microphone (notebook, headset, or stand-alone-microphone)

4. Audio (notebook or headphones)

5. Filesharing for lesson materials (GoogleDrive, OneDrive, teaching-platforms)

6. Digital microscopy slides (live or pre-scanned)

Teaching platform

Some commercial teaching platforms go beyond just storing and viewing slides. Some allow academic tutors to build extensive libraries of slides for review by students using the web. Virtual slides, pre-annotated cases, exams, course notes, and multimedia content can all be integrated into a teaching platform, creating a flexible digital slide resource accessible from anywhere with internet access.

Most teaching platforms have well designed graphical user interfaces and provide many teacher-friendly features like visibility control that allows the administrator to sequentially release content to users. Administrators can also define customer access to virtual slides for individual students and specific student groups. Teaching platforms can be used to completely change the dynamic in the classroom and even help students work outside of class and continue their education at their own speed [3].

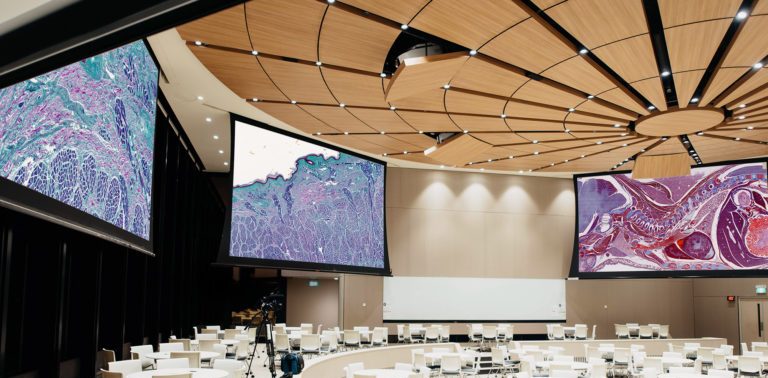
Step 5: Viewing/ Observation

Digital microscopy
First and foremost, students will have to have a viewing software to view the stored images. They can view virtual slides directly on their pc, if they have the viewer software locally installed or they can use a web-platform to access the slides in your browser. Some providers of microscopes/scanners provide their viewing software free of charge, with others you have to check how much it would cost to provide enough licenses for the whole class.
There are two different scenarios of how students can observe the virtual slides. The first scenario is that there is a set of computers connected to an internet network with a server running a database (on-premises server) of virtual slides and logging in rights for several students to access the contents. This can be done in many ways depending on the restrictions of the university. The second scenario is using a dedicated website or cloud-based system.
Microscopy database cloud
For websites to be able to host digital slides, the files must be compressed to cut back on the amount of digital data. The quality and some features are reduced in web-exported virtual slides, but they can be viewed easily even over a long-distance internet connection [4]. To solve this problem, the virtual slides are not loaded entirely at once, but only the parts, that are currently viewed by the user are sent. In this way, the file size and compression do not matter as much. This technique is commonly known from online maps for car navigation and allows us to smoothly explore the digital slides. To be able to access the slides very easily, it is best to look for a browser-based virtual microscopy solution, that can be used by everyone with a computer or mobile device. This method is especially useful for distance learning and self-learning. For example, in the wake of the COVID-19 virus, students were not able to go to a laboratory filled with computers. The first scenario was not ideal and the second scenario, where students could learn at a distance, was the better of the two during this time.
[1] Nova, A. (2020, March 14). Your college closed early because of coronavirus. You might not get your money back. Retrieved from https://www.cnbc.com/2020/03/13/why-students-arent-getting-refunds-after-coronavirus-college-closings.html [2] Lauro, G. R., Cable, W., Lesniak, A., Tseytlin, E., Mchugh, J., Parwani, A., & Pantanowitz, L. (2013). Digital Pathology Consultations—a New Era in Digital Imaging, Challenges and Practical Applications. Journal of Digital Imaging, 26(4), 668–677. doi: 10.1007/s10278-013-9572-0 [3] Krajci, Dimitrolos & Pospísilová, E & Cernochová, Drahomíra. (2011). Methods of application of virtual slides in modern histology practical teaching. [4] Krajci, Dimitrolos & Pospísilová, E & Cernochová, Drahomíra. (2011). Methods of application of virtual slides in modern histology practical teaching.
Discover PreciCloud, the teaching platform for your microscopy courses.